How to Build a Good Base for Your Greenhouse
The spring sun is finally here, and the evening hours are getting longer. Regarding the greenhouse, a little has happened as well. We have laid tiles and put up the greenhouse! But let me first take you back to the building process by starting with the excavation.
Text and photos: Louise, Juliana Greenhouses
In this process, I have allied myself with two greenhouse installers, Sanne and her husband Thomas. Thomas, besides being a greenhouse installer, has worked in the garden service industry for over 30 years. Thomas has been a great help in our greenhouse process, always ready with a good piece of advice or two. We had them over to discuss what needed to be done to get ready for laying tiles. We agreed that my better half and I would take care of leveling the ground and digging 20 cm down so that 15 cm of gravel and a 5 cm high tile could be laid.

The pit
Photo: Louise Jensen

This is what the result looked like after several days of digging by hand. Our neighbour was (thankfully) interested in the soil which he could use for his raised beds, so we gave him the soil and thus avoided a trip to the recycling centre
Photo: Louise Jensen
I know that a stable and good foundation will form the basis of a perfect result for your greenhouse
As you can see on the below picture the height difference is larger on the right side, so the soil should be levelled from the tiles to the hedge.
Thomas has 6 tips for you who want to place your greenhouse on tiles:
Tip 1: If you want tiles in your greenhouse, it is a good idea to lay the tiles before putting up the greenhouse.
Tip 2: Avoid dark tiles, as the greenhouse will get very hot.
Tip 3: The tiles should be level as your greenhouse should be level.
Tip 4: You should sweep the tiles with grit to fill all the joints, and then sweep the tiles clean before putting up the greenhouse base.
Tip 5: Take out the tiles where the base must be casted. When you have casted the base (remember to take diagonal measurements, to make sure the base is even), the let it dry for 48 hours.
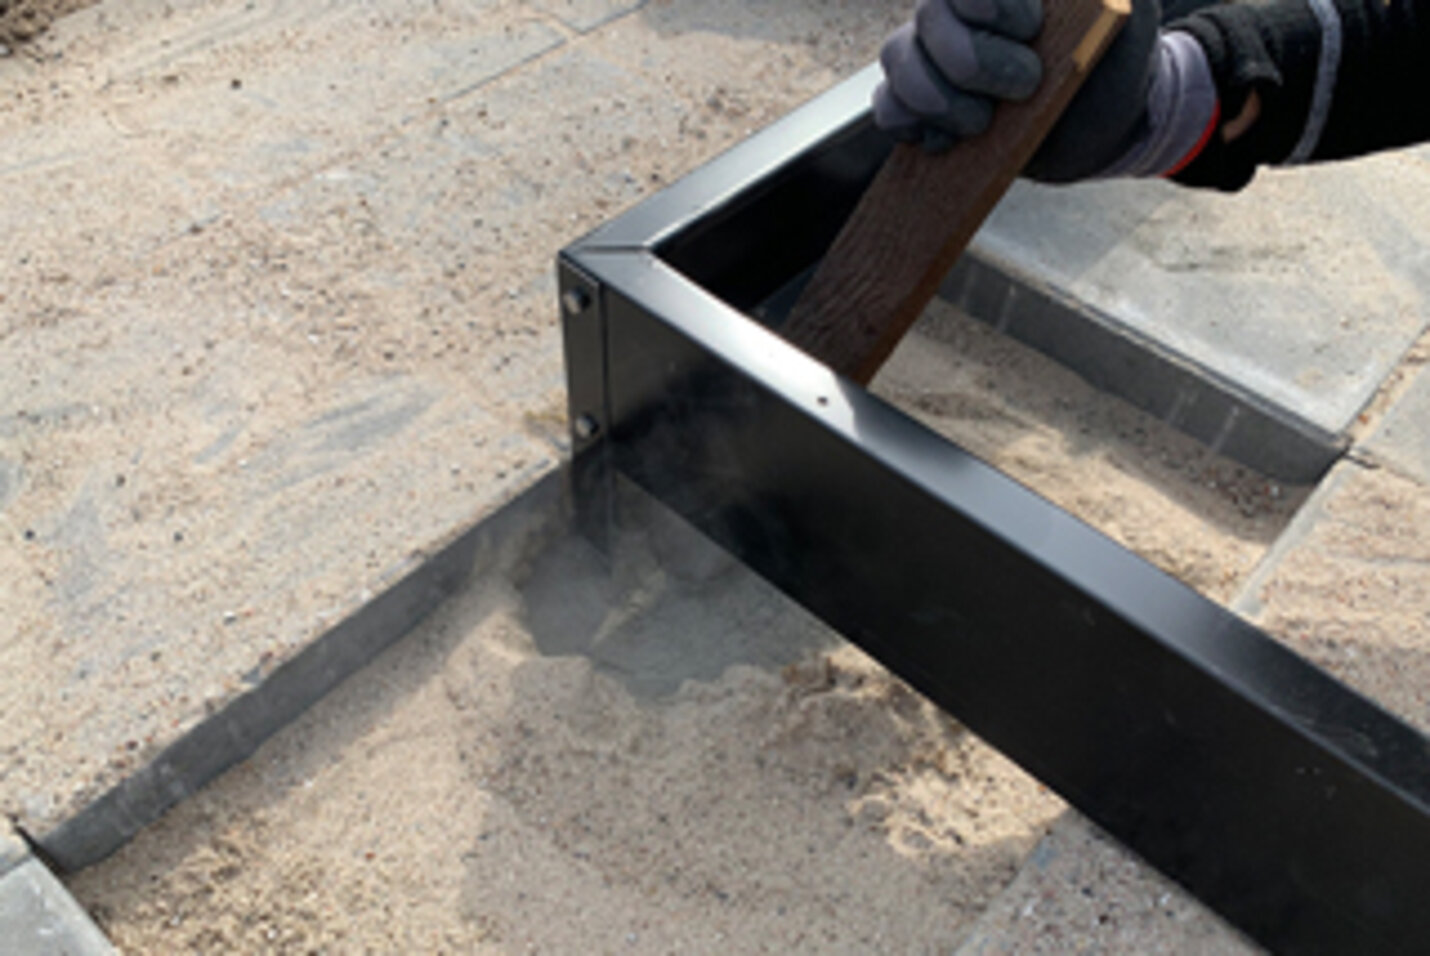
Tip 6: To get a nice finish around the corner fittings screw off the base frame on the casted fittings and cut out the tile. After the tiles are put back, you can assemble the base frame again and then assemble the entire greenhouse.
The day before the day
I agreed with Sanne that like so many others, we could spend the Easter days laying gravel and tiles. However, we got disappointed as the tiles were not delivered by then. Of course, we were really annoyed about this, now that Easter is most often spent preparing for the garden season. Plan B was initiated, so we laid out gravel and got ready for the tiles that would come after Easter.

Sanne conpacts the clay gravel.
Photo: Louise Jensen

Then topsoil is spread on top
Photo: Louise Jensen
Wheelbarrow after wheelbarrow with clay gravel was laid, which Sanne had levelled and compacted a few times, so that it could be as flat as possible. Clay gravel is bottom protection gravel. It contains clay, so when you compact it, it becomes very hard. Subsequently, topsoil was laid on, which is not as heavy to move around on.
Poles were put into the ground I each corner with a string connecting them. The height of the string should be so that the planks are able to lie just below the string because the height of the planks are 2 inches just like the tile height. In this way, you make sure to get it all level.

The planks should be placed before the topsoil is spread, in that way, you know how much topsoil you need.
Photo: Louise Jensen

The topsoil is levelled with the spirit level before the tiles are laid
Photo: Louise Jensen

The tiles are then laid and compacted to make sure they are level
Photo: Louise Jensen

The tiles are compacted, and the base should then be assembled
Photo: Louise Jensen
It is a several days project
You would think that when the tiles are laid, all there would be left is to assemble the greenhouse, but no. I had to exercise patience, as the drying time of the concrete is essential. We had organized the steps carefully and the guide will show the different processes.

Step 1: Assemble the base and place it where you want the greenhouse.

Step 2: Take out the tiles where the base needs to be cast.
Step 3: Cast the base and wait 48 hours!

Step 4: Disassemble the base frame, so that only the cast fittings are in the ground.

Step 5: Measure how the tiles should be cut.

Step 6: Cut the tiles and put them back.

Step 7: Reassemble the base frame.

Step 8: Now the greenhouse can be assembled.
Utilize the waiting time to assemble the gables of the greenhouse, while the concrete dries. In that way, you can easily put up the profiles when the concrete has dried, and the tiles are put back.
The greenhouse is now up and we will see if I can get to buy some tomato and cucumber plants and start the season this year.
Best wishes
Louise, Juliana Greenhouses

Transform Your Greenhouse Life
Are you looking for fresh inspiration to transform your greenhouse life into a lush paradise? Let's explore new ideas and tips together that will make your green haven even more magical!


JULIANA GROUP
Juliana Group is a leading global supplier of quality residential greenhouses. Founded in 1963 by Mogens A. Stærmose in Odense, Denmark, the family-owned company is today owned by third generation, Nikolaj Stærmose. The headquarter remains Odense-based with subsidiaries in the UK and Germany and export to more than 20 countries.
’We help people grow’. That is why our brands Halls and Juliana set the frame for experiences that are as natural as they are magical. Despite our long history, we’re future-focused and curious on how we can improve the sustainability of our greenhouses. Learn more about Juliana and find inspiration for life in the greenhouse in our inspirational universe.

